How to Combine Reports from Multiple Business Central Insights Apps in Power BI

This guide explains how to combine selected reports from different Business Central Insights apps into one Power BI app.
For example, you may want users to access both Sales Insights and Inventory Insights reports from one place, without giving them every report from each original app.
The same process can also be used to combine reports from three or more apps, such as Sales, Inventory, Finance, Purchasing or any other Business Central Insights app.
Important Notes: When you copy a report into a new workspace, only the report is copied. The semantic model remains in the original Business Central Insights workspace.
For example: The copied Sales report still connects to the corresponding Sales Insights semantic model.
You can check this using Lineage view in Power BI.

Once you create a copy of a standard Business Central Insights report, that copied report will no longer be automatically upgraded with future report layout changes.
Business Central Insights regularly publishes product updates, including new features and improvements.
Updates to the semantic model may still benefit the copied report, but changes to the report pages, visuals or layout will not automatically appear in your copied version.
If you want to use the latest version of a standard report in future, you will need to repeat the copy process using the newly updated report.
Note: A Power BI Pro licence is normally sufficient for this setup.
Step 1: Create a New Workspace
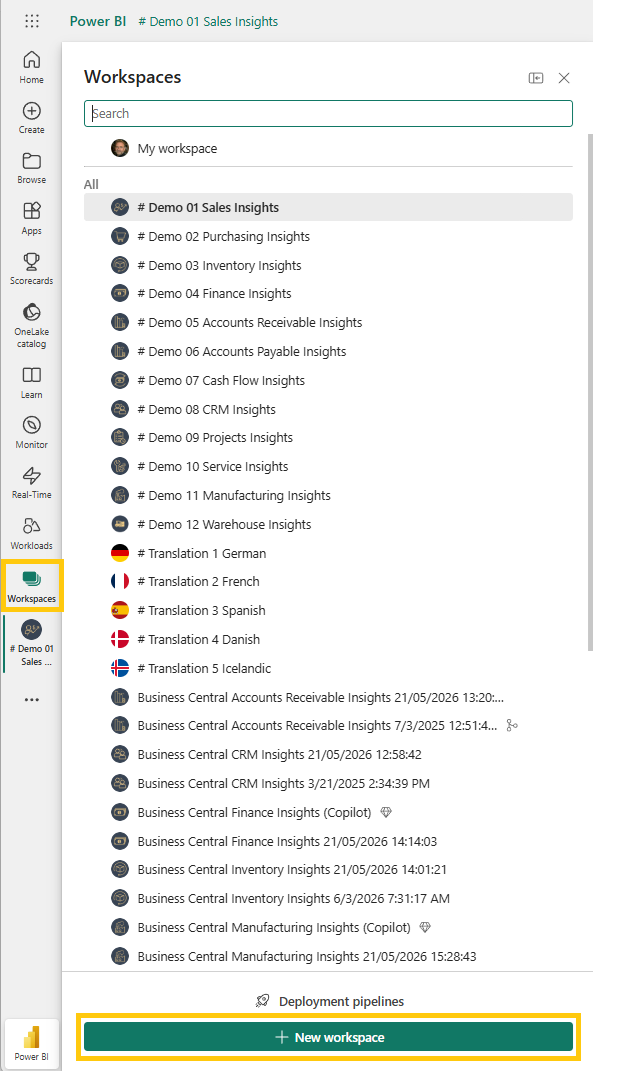
In Power BI Service, go to Workspaces and select New workspace.
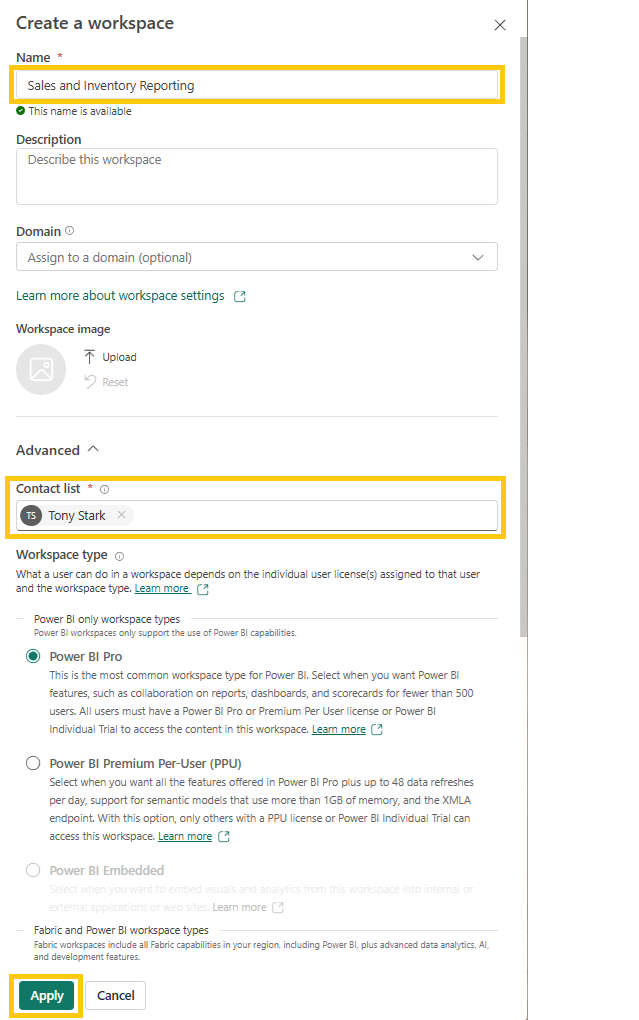
Give the workspace a clear name that reflects the intended audience or purpose. For example: Sales and Inventory Reporting
Enter Users or Groups.
Click Apply
Step 2: Copy the First Report into the New Workspace
Open the workspace that contains the first report you want to include. For example, open your Sales Insights workspace.
Go to the report, select the 3 dot menu, then Save a copy from the dropdown.

3. Choose the new workspace you created.
Rename the report if needed, for example: Sales Reports
Click Save
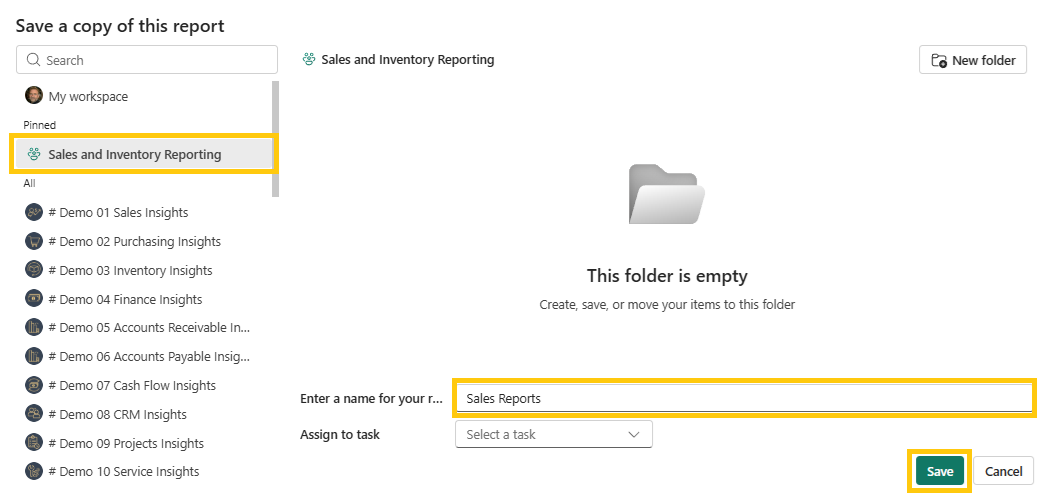
This creates a copy of the report in your new workspace. The report copy will still use the original Sales Insights semantic model as its data source.
Step 3: Copy the Second Report into the New Workspace
Next, repeat the same process for the second app or additional apps.
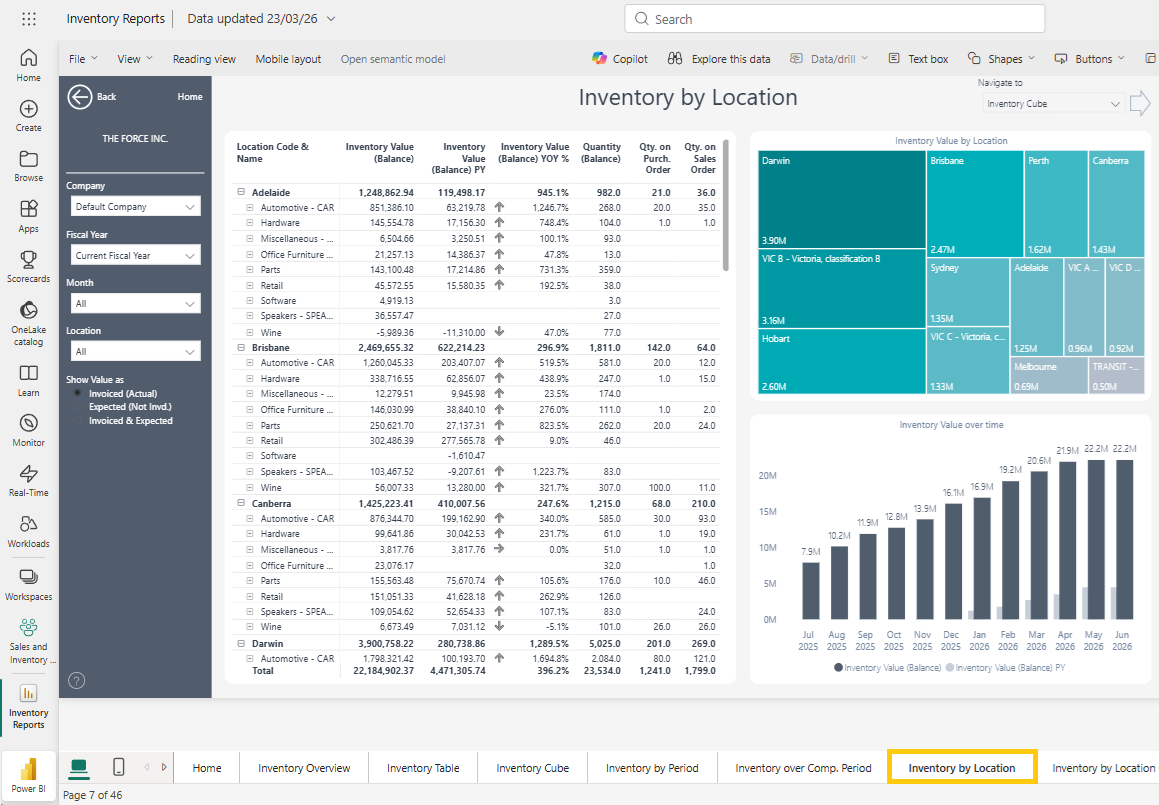
1. Open your Inventory Insights workspace.
2. Go to the report, select Save a copy, then choose the same new workspace.
3. Rename the report if needed, for example: Inventory Reports
You now have copies of both the Sales Insights and Inventory Insights reports in one workspace.
Step 4: Edit the Reports for Your Users
1. Open the copied report in the new workspace and select Edit.
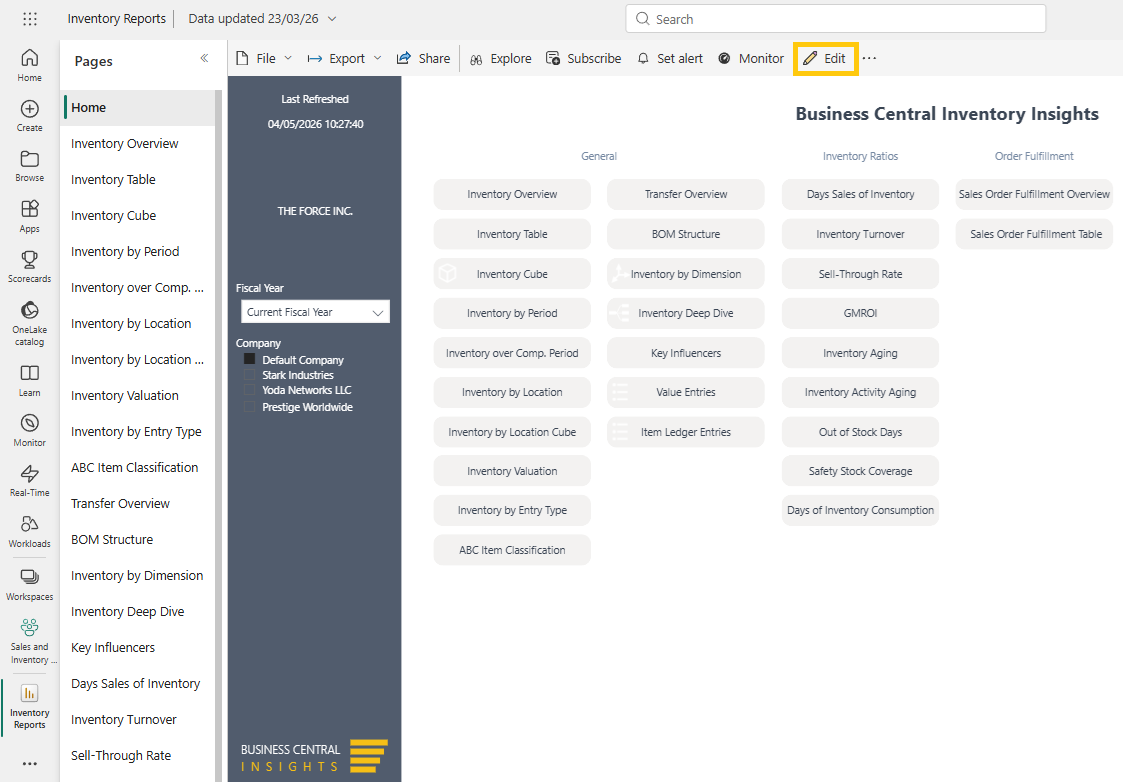
You can now customise the report for your intended users.
For example, you can:
Delete report tabs
Reorder pages by dragging the tab
Remove visuals users do not need
Create a simplified version for a specific team or role
To delete a report, click the report page tab and hit Delete.
To remove a visual, click the report tab at the bottom, select the visual and hit Delete
You may also need to hide or remove any homepage navigation buttons that link to that hidden page.
Step 5: Use Profiles for Homepage Visibility
Business Central Insights also includes a Profiles feature in the Connector app.
Profiles allow you to control which reports are highlighted or hidden from the homepage.
This is useful when you want to simplify the homepage experience.
However, Profiles only control homepage visibility. They do not remove report pages from the report itself.
If you need to stop users from seeing a report page, you must edit the report and manually hide or remove the page.
Information can be found here: https://businesscentralinsights.com/profiles
Step 6: Create the Combined Power BI App
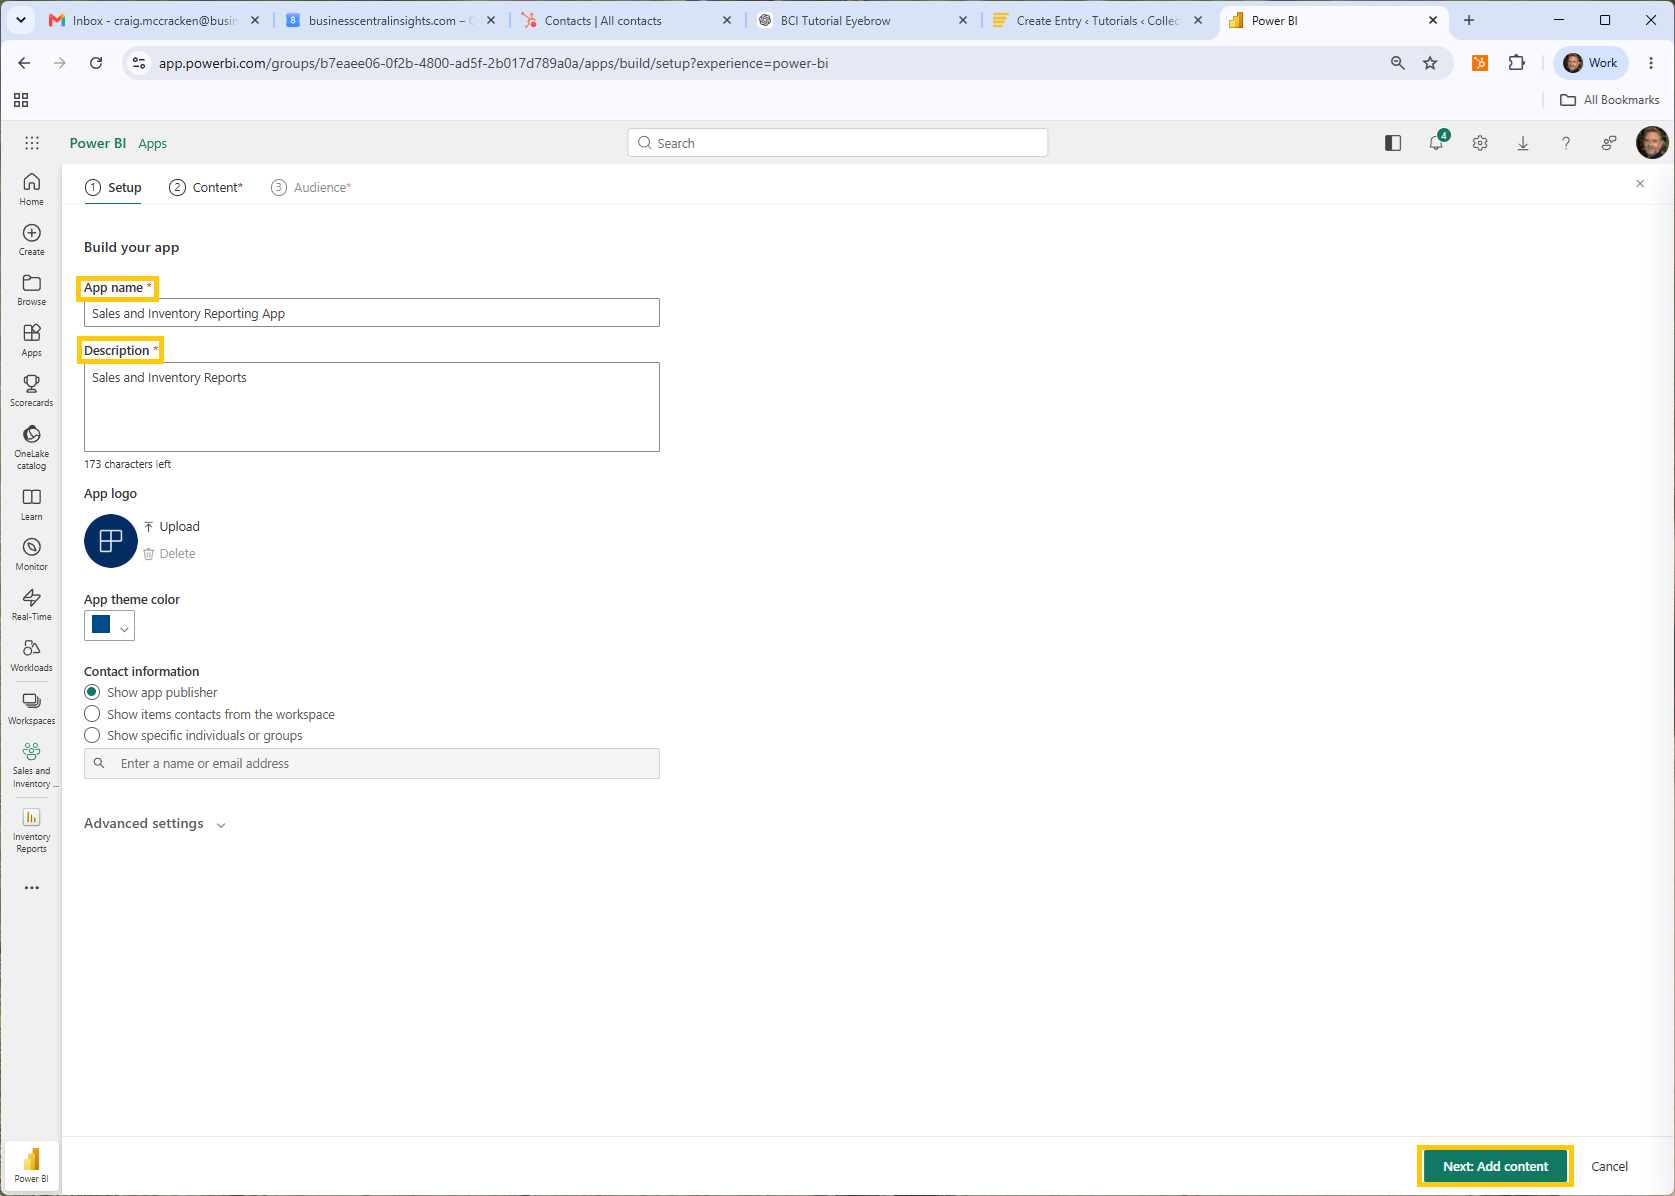
Once the copied reports are ready, go to the new workspace and select Create app.

2. Give the app a clear name, such as: Sales and Inventory Reporting App. Add a description, add a logo or colour theme if needed, then select Add content.
Add the relevant reports by clicking the boxes. For this example, select: Sales Reports + Inventory Reports, then click Add
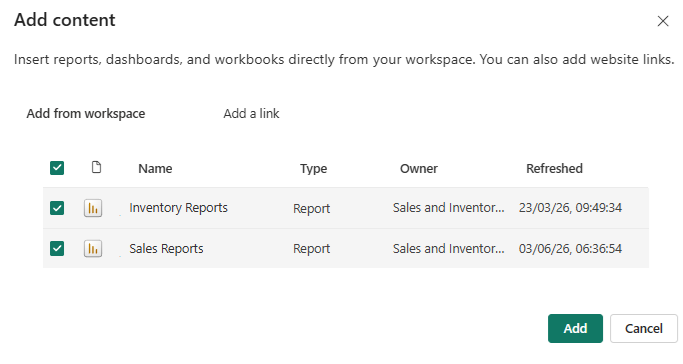 You can also change the order in which reports appear in the app navigation.
Step 7: Add the App Audience
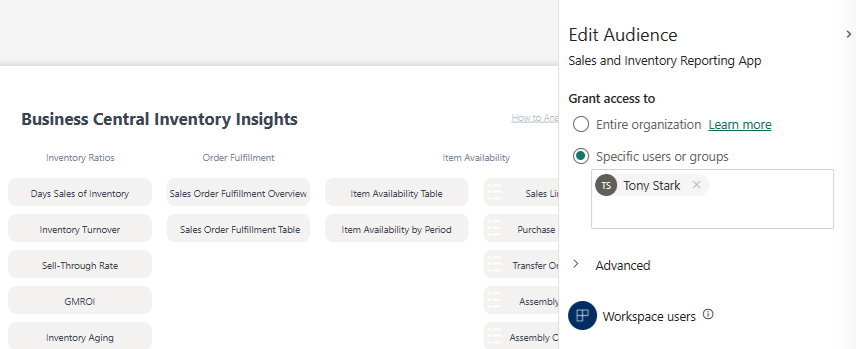
Click Add audience:
In the Audience section, add the users or groups who should have access to the combined app. This allows users to see both reports together in one Power BI app.
 3. Click Publish App
From the user’s perspective, the reports appear in one place, even though they originally came from different Business Central Insights apps.
Step 8: Check Build Permissions
Users may also need Build permission on the original semantic models used by the copied reports.
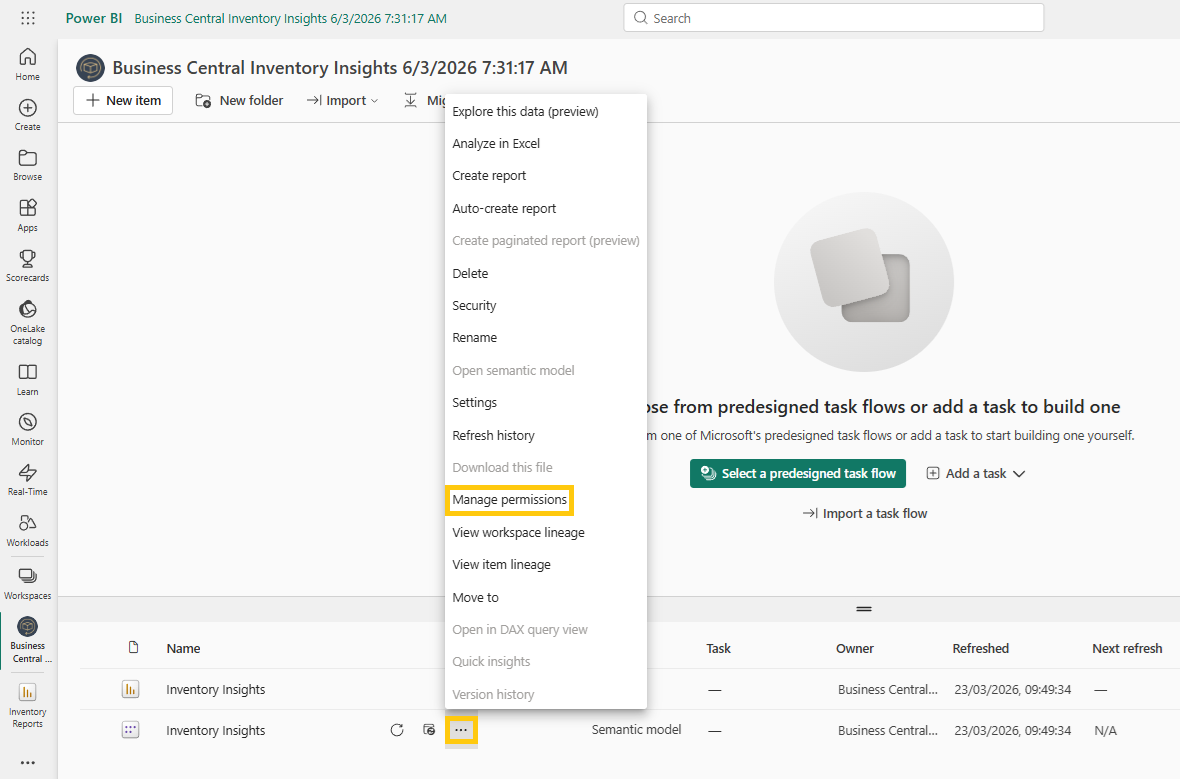
To check this, go to the original workspace, open the semantic model, then select Manage permissions. From there, you can add Build permission for the required users or groups.
When publishing the app, you can also check the advanced app audience settings and allow users to build content with the datasets in the app audience if required.
Note: Only enable sharing or build options where appropriate for your organisation’s security policies.
Step 9: Publish and Share the App
1. Once the reports and permissions are ready, publish the app.
2. Power BI will create a shareable app link. You can send this link to the relevant users so they can access the combined reporting experience.
Information on sharing reports can be found here: https://businesscentralinsights.com/bookmarks-and-links
Summary
By copying selected reports into a new workspace, you can create a tailored Power BI app that combines reports from multiple Business Central Insights apps.
In this example, we combined reports from two apps:
Sales Insights
Inventory Insights
The same process can also be used for more apps, such as Finance, Purchasing, Manufacturing or Projects.
This approach is useful when different users need a focused reporting experience without accessing every report from every app