Bookmarks & Links: How to Save and Share Report Views

Bookmarks in Power BI let you save a specific “view” of a report page – including filters, slicers, drilldowns, sort order and selected visuals. You can then jump back to that exact view with one click, instead of re-setting everything each time. Microsoft Learn
This is especially useful in Business Central Insights when you:
Have a favourite way of looking at a report (e.g. a particular country, dimension or period).
Want a default view to open every time you visit a report.
Want to step through a set of saved views when presenting to colleagues.
Bookmarks created by you are called personal bookmarks – only you can see them. Report designers can also create report bookmarks that everyone with access to the report can use.
How to open the Bookmarks pane
Open the relevant Business Central Insights report in the Power BI service.
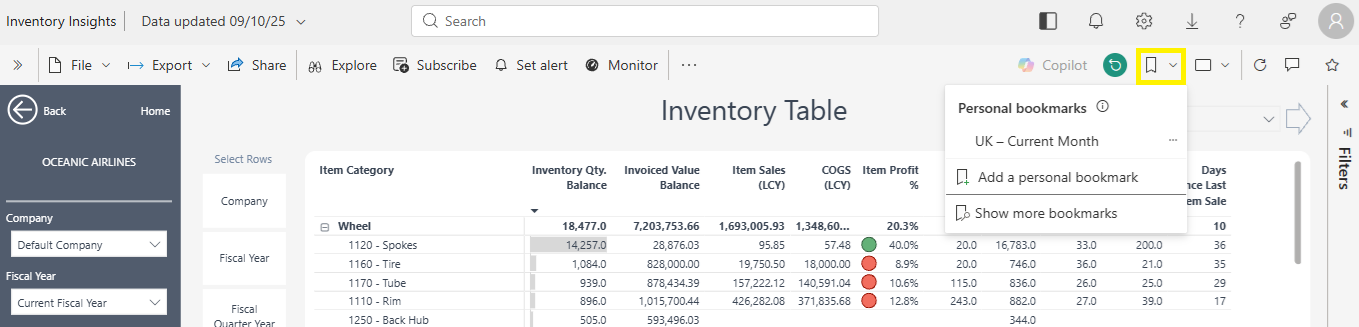
On the report toolbar, select the Bookmarks icon.
How to create a personal bookmark
Open the report page you want to save.
Set up the page exactly how you want it:
Apply filters and slicers.
Drill down or cross-highlight visuals.
Change the sort order if needed.
In the Bookmarks pane, expand Personal bookmarks (if it’s not already expanded).
Select Add a personal bookmark.
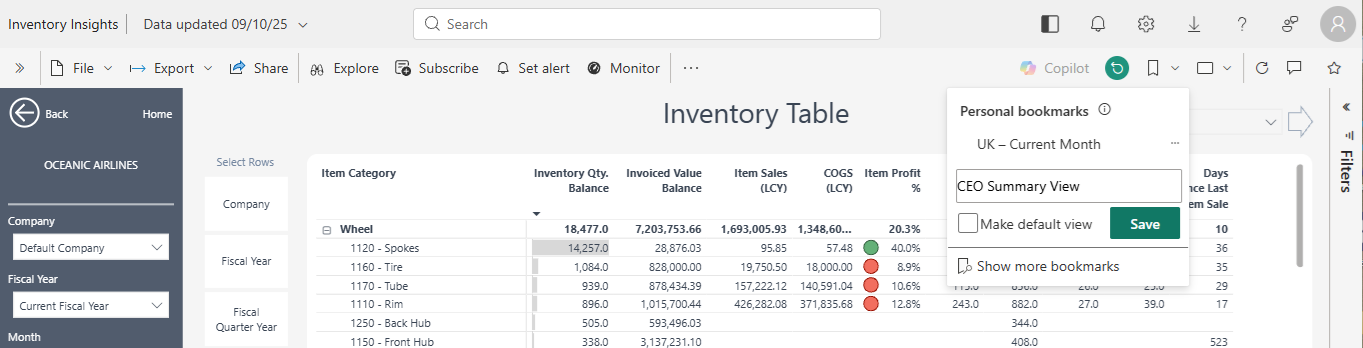
Give your bookmark a clear name (e.g. “UK – Current Month”, “CEO Summary View”).
(Optional) Tick Make default if you want this to be the view that opens every time you return to this report.
Select Save.
Power BI will now remember that exact view (page, filters, slicers, drill, sorts and selection state).
How to use and manage your personal bookmarks
To switch between bookmarks:
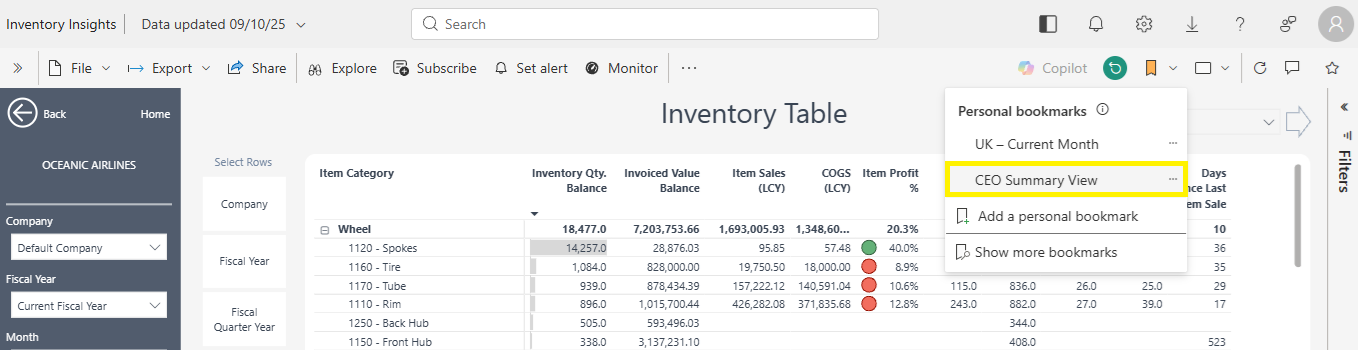
Open the Bookmarks pane.
Under Personal bookmarks, select the name of the bookmark you want to view.
The report will automatically change to match that saved view.
 To rename, update or delete a bookmark:
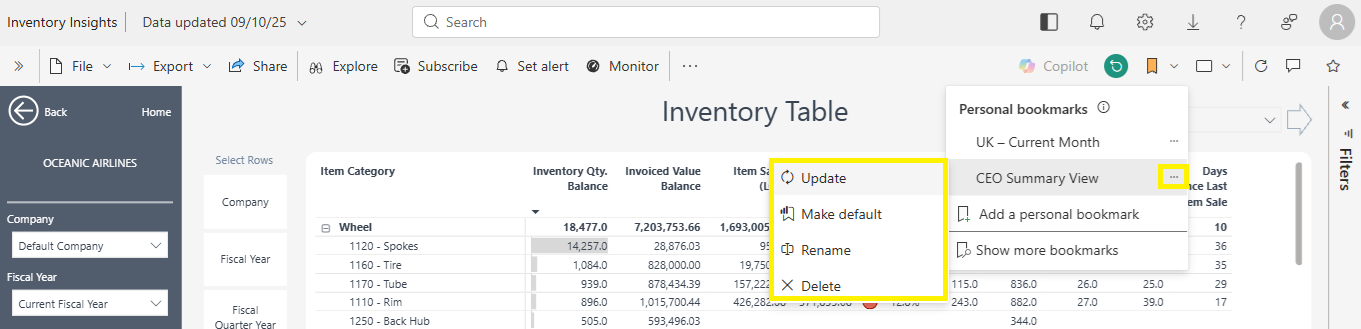
In the Bookmarks pane, hover over the bookmark name.
Select the ellipsis (…) next to the bookmark.
Choose one of:
Update – saves the current view back into that bookmark.
Make default – makes this your default view.
Rename – change the bookmark name.
Delete – remove the bookmark.
 Resetting back to the original report view
If you’ve made lots of changes and want to go back to the original view defined by the report designer:
From the top-right of the report canvas, select Reset to default.
Confirm the reset when prompted.
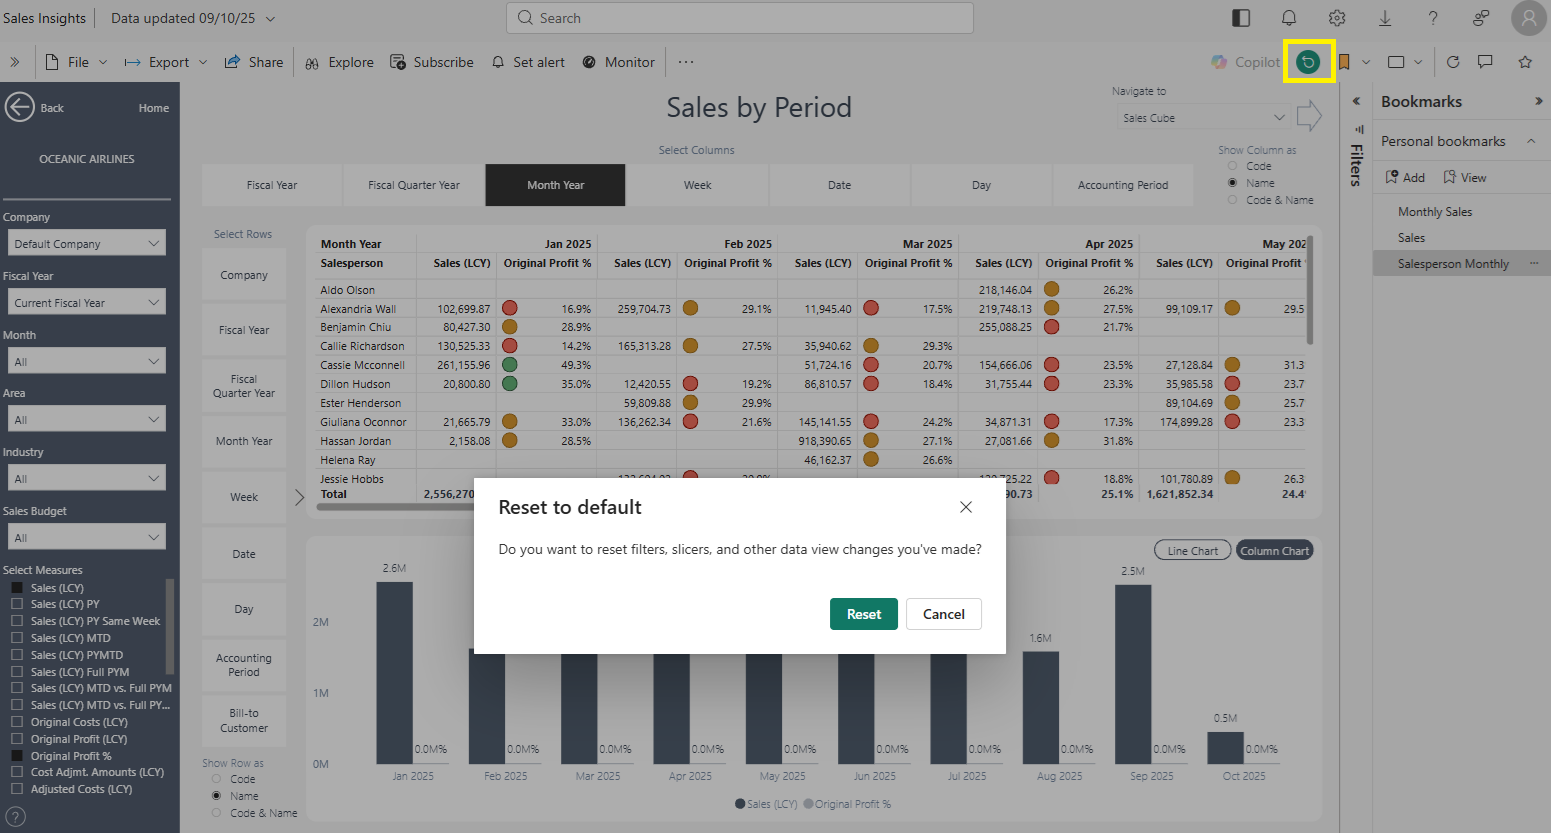
This clears your temporary changes on the page but does not delete your personal bookmarks.
Considerations and Limitations: https://learn.microsoft.com/en-us/power-bi/consumer/end-user-bookmarks#considerations-and-limitations
Share Report Link
What does “Share report link” do?
“Share report link” in Power BI allows you to generate a secure URL that lets colleagues open the same Business Central Insights report in their browser. When you share a link, you can control:
Who can use the link
(entire organisation, specific people, or only people who already have access)Whether recipients are allowed to reshare the report
Whether they can build their own content
(for example, creating new Power BI dashboards using the dataset)
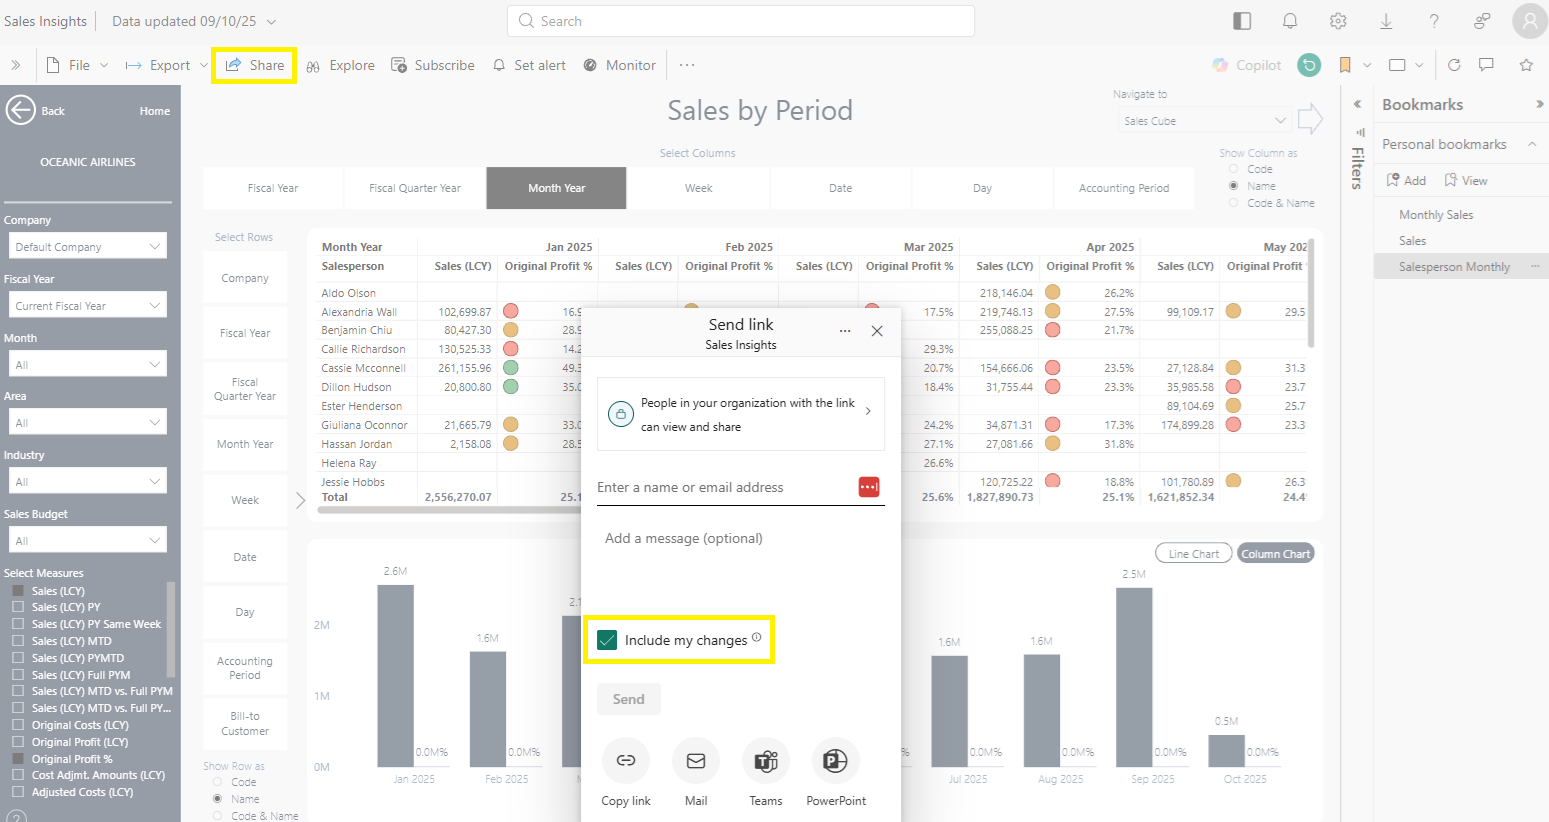
When sharing Business Central Insights reports, we strongly recommend enabling Include my changes, so recipients see the exact filtered view you’re sharing.
 Important limitation: when the Share link is available
The Share report link option is only available when reports are shared from a Power BI workspace.
If your team accesses the reports through a Power BI app, the Share link button will not appear. In apps, the only option is Share in Teams, which sends a Teams card rather than a usable URL link.
So, to generate a proper shareable link, the report must be accessed from a workspace.
You can learn how to enable workspace access here: https://businesscentralinsights.com/share-power-bi-workspace
This behaviour is also explained in this video tutorial: https://www.youtube.com/watch?v=xBhjQqUw_TU
How to share a Business Central Insights report using a link
Open the report in the Power BI service
Go to Power BI service in your browser.
Open the relevant Business Central Insights app.
Select the report you want to share.
Select the Share button
On the report toolbar at the top, select Share.
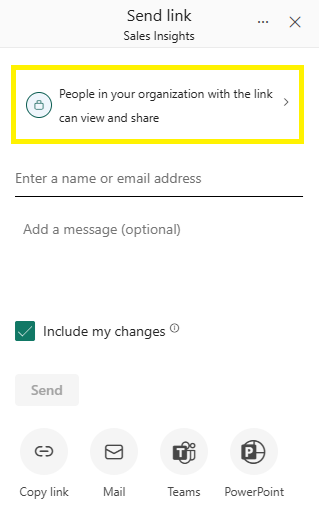
Click People in your organization with the link can view and share
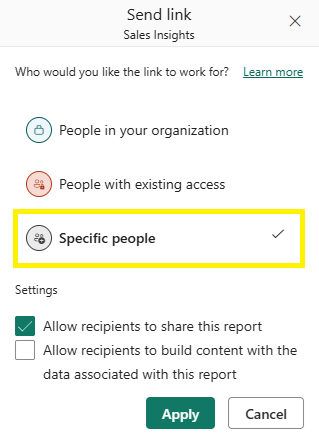
Choose who the link is for
In the Send link dialog you’ll usually see options similar to:People in your organisation – anyone in your organisation with the link can view (if your admin allows this).
Specific people – you choose exactly which people or groups can use the link (this can include guests if enabled).
People with existing access – sends a link only to people who already have access; it doesn’t grant new permissions.
For most BCI scenarios, Specific people are the safest option.
Set permissions for the link
Depending on your organisation’s settings you may see options such as:
Allow recipients to share this report (Reshare) – tick this if you’re happy for them to pass it on to others.
Allow recipients to build content with the data (Build) – tick this only if you want them to be able to build their own reports or dashboards using the underlying dataset.
If you’re not sure, it’s usually safest to leave build unticked, lastly click Apply
Enter the recipients
Type the names or email addresses of the people you want to share with.
Optionally add a short message explaining what the report shows or what you’d like them to review.
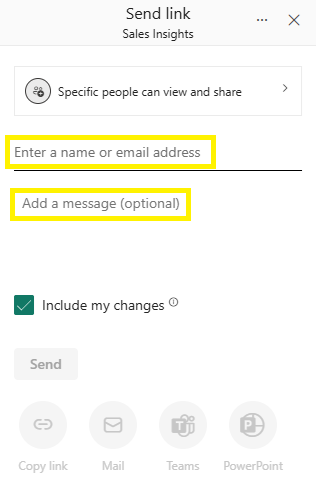 6. Send or copy the link
You now have two main options:
Send directly from Power BI
Click Send to email the link to the recipients from Power BI.
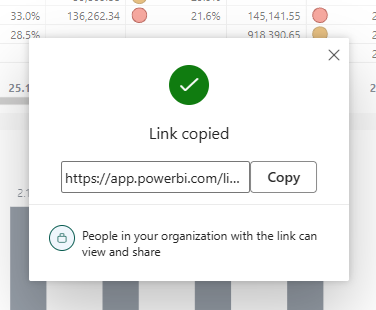
Copy link to use elsewhere
Click Copy link.
Paste the link into an email, Teams chat, ticket, CRM record or any other tool your team uses.
How recipients access the shared report
When someone receives your link and opens it:
Power BI checks they have permission to view the report (either via the link you created or existing access).
Once they’ve opened it, the report will also appear under Browse > Shared with me in the Power BI navigation pane, so they can easily find it again later.
If they don’t have the right licence or permissions, they may see a message asking them to request access or upgrade their licence.
How to manage shared report links
Go to the workspace
Open the workspace where your Business Central Insights reports are stored (this only works when sharing from a workspace, not from an app).Locate your report
Find the report you previously shared.Open Manage permissions
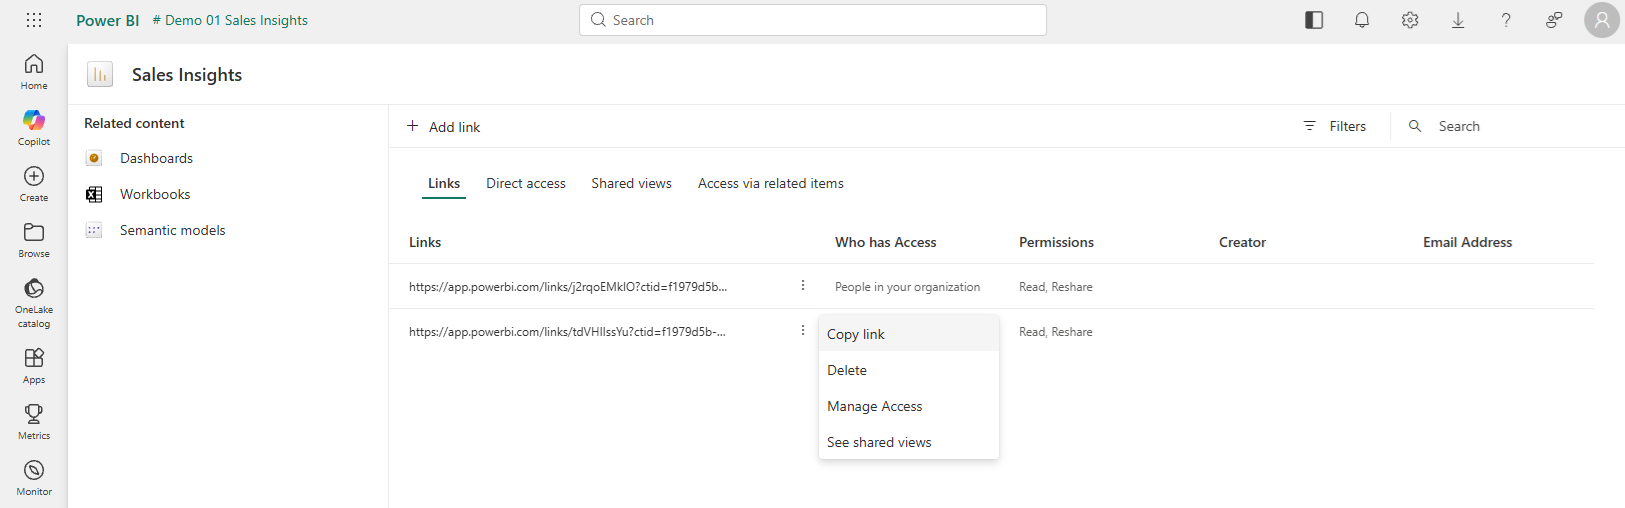
Select the ellipsis (…) next to the report name and choose Manage permissions.
Here you’ll see:People who have been granted access
All active share links
Their permissions (view, reshare, build)
You can also Copy link, Delete, Manage Access and See shared views
Review and edit link settings
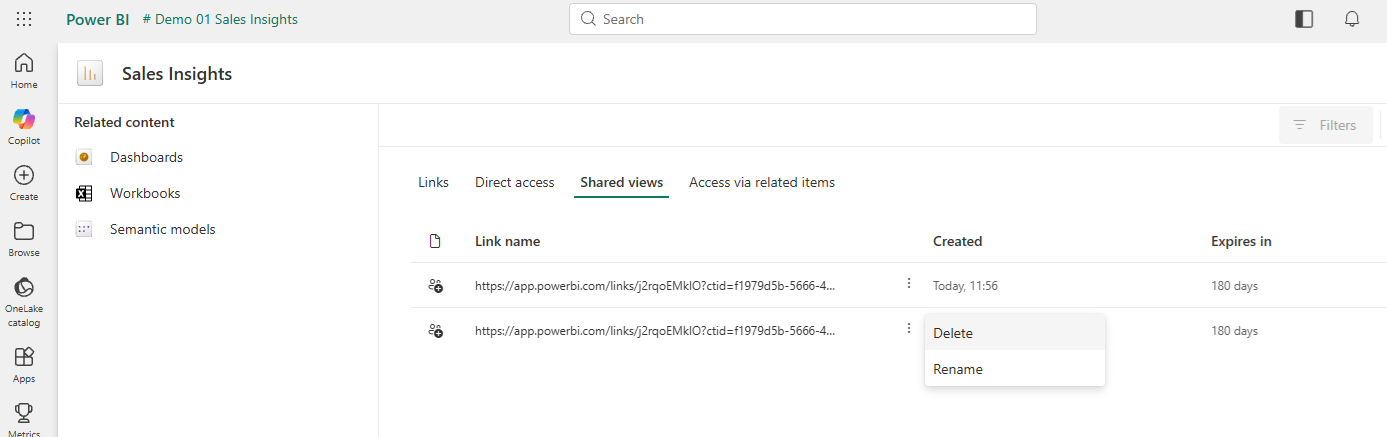
From the Shared views tab you can:See every active share link and who can use it
Rename a link for clarity
Remove a link entirely
Check expiry dates (Power BI links automatically expire after 180 days)
Understanding link expiry (180-day rule)
Each shared link expires after 180 days of inactivity.
The countdown resets every time someone opens that link.
If no one uses the link for 180 days, Power BI automatically removes it.
Removing or expiring a link does not remove the user’s workspace access, only the specific link.
Shared Views help teams stay aligned, especially when using complex Business Central filtering (dimensions, attributes, companies, periods).
Tips and good practice for Sharing reports
Use “Specific people” for sensitive reports
This gives you tighter control over who can open the link.Combine with bookmarks
Use a personal bookmark to create the exact view you want, then share with Include my changes enabled so everyone lands on the same filtered view.
Best Practices for Power BI Links and Bookmarks
Power BI bookmarks are useful for saving report states, filters, and navigation paths, but they can easily break when the underlying data model changes.
Important Limitation
If a field used in a bookmark is renamed or removed, Power BI will no longer display visuals, filters, or slicers that depend on that field. As a result, the bookmark may stop working as expected.
Our Recommendation
To avoid issues and ensure consistency:
Document all bookmarks in a separate file.
List the filters, slicers, and fields each bookmark relies on.
Note any dependencies on specific semantic model elements.
This makes it easy to understand what each bookmark does and quickly rebuild it if model changes cause problems.
Need Support?
If you use complex filters or advanced navigation, book a call with us. We can help you design more stable filtering approaches, such as adding new fields, using item attributes, or leveraging dimensions, totals and hierarchies.